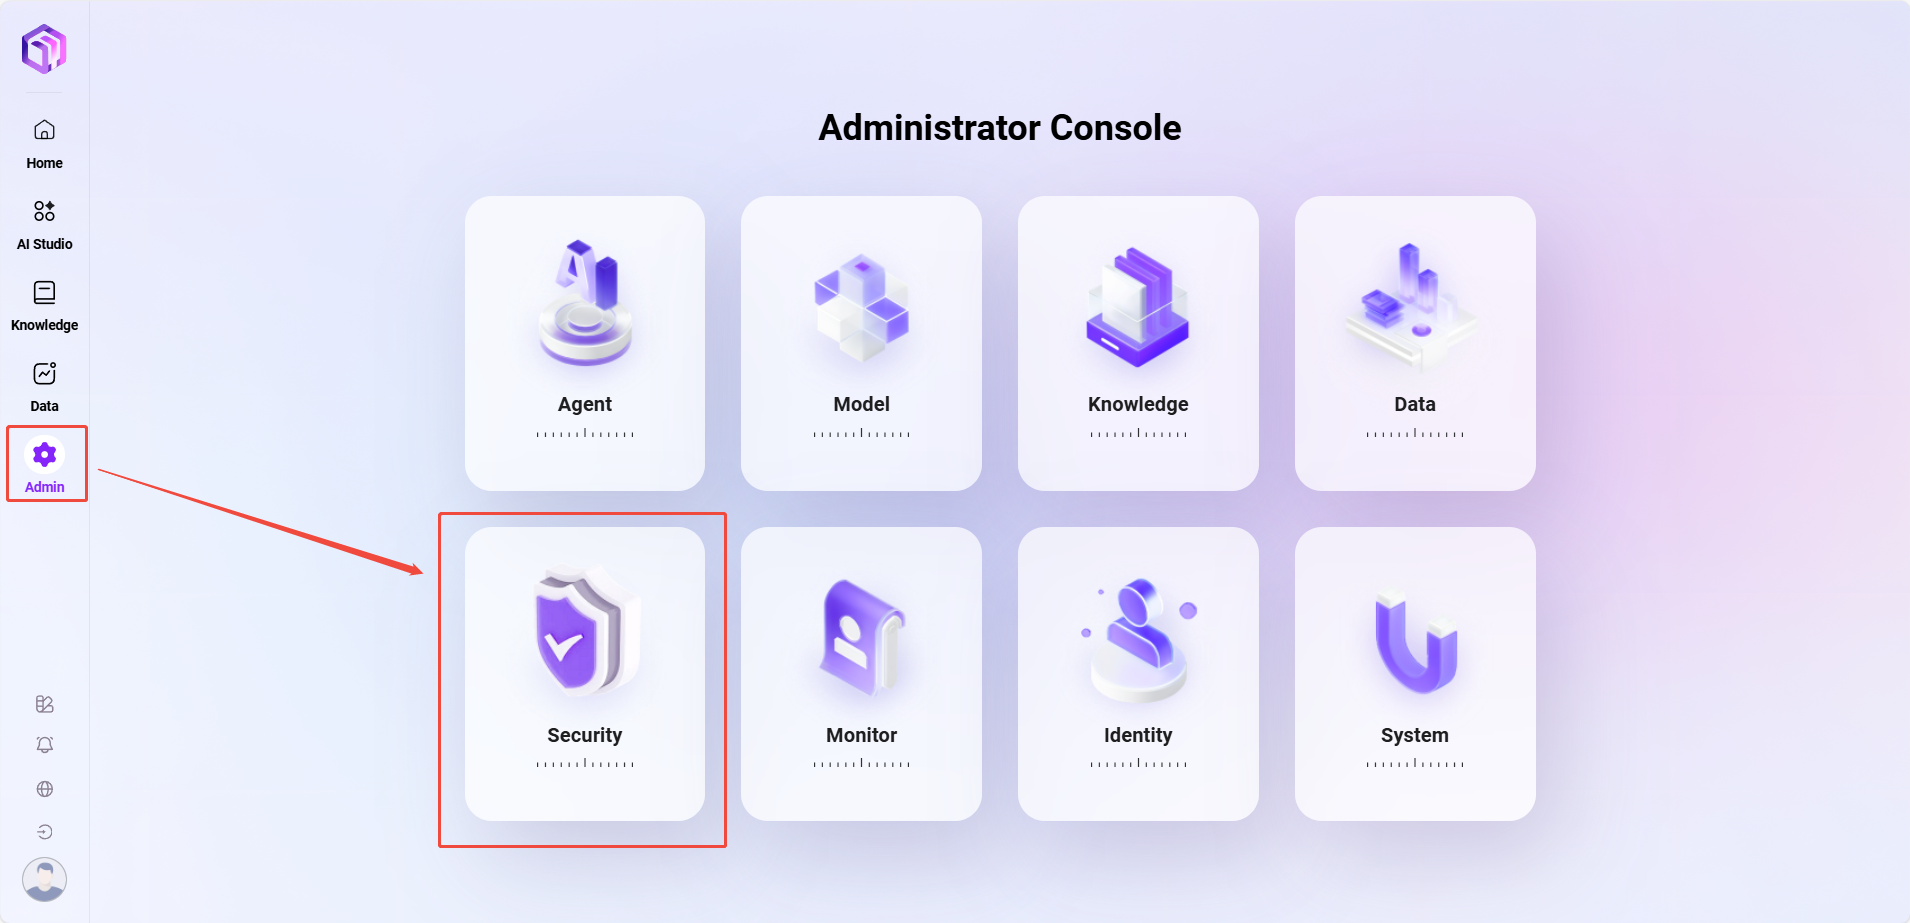
Content Security Management
The entry point for content security management is shown below:
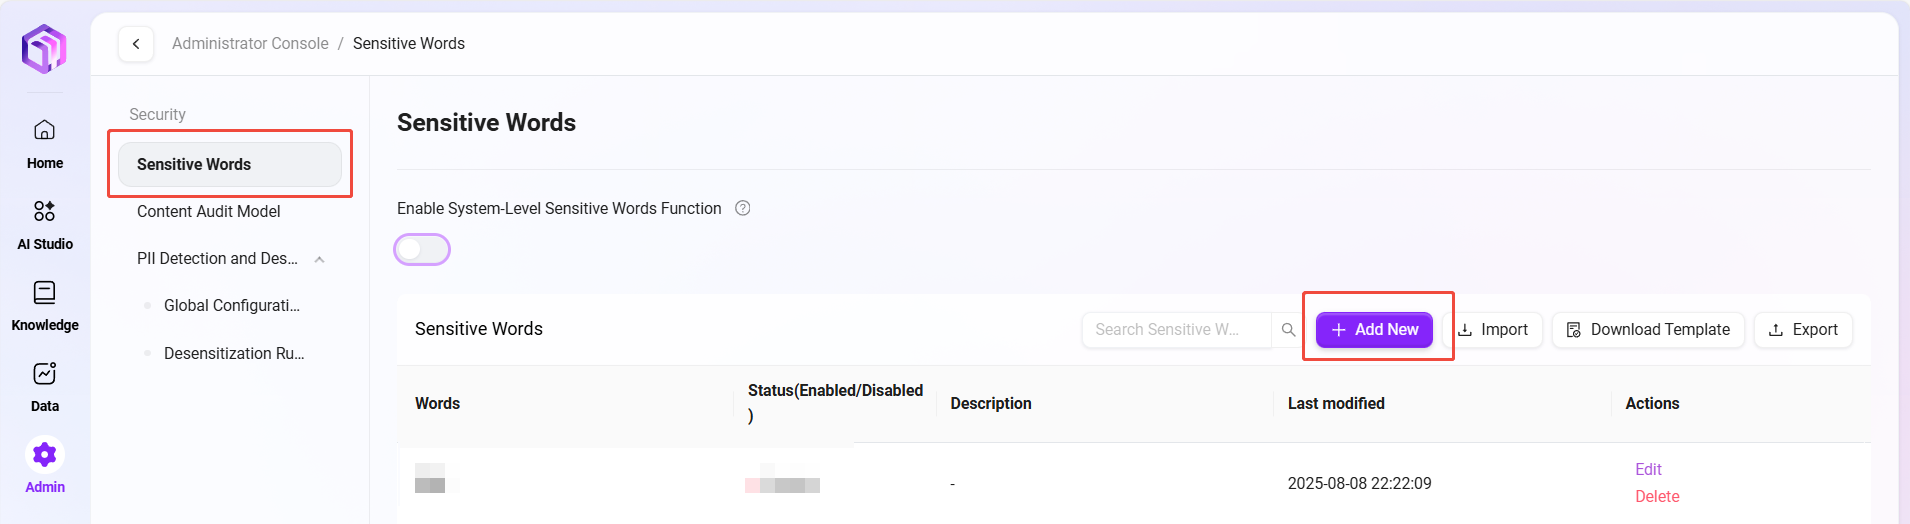
Sensitive Word Management
The sensitive word management feature helps users effectively control platform content, ensuring compliance, healthiness, and alignment with internal corporate policies or community management standards. By defining sensitive words, the system can intelligently identify and intercept them during content generation, display, or storage stages, preventing the spread of sensitive information.
Feature Highlights
- Supports batch import and export, facilitating centralized management of large volumes of sensitive words
- Flexible status control, allowing each sensitive word to be individually enabled or disabled
- Supports description information, making it easier to record the background and purpose of sensitive word settings
- Import template validation mechanism, preventing format errors or duplicate entries during import
Adding New Sensitive Words
Users can manually add one or more sensitive words by following these steps:
- Navigate to:
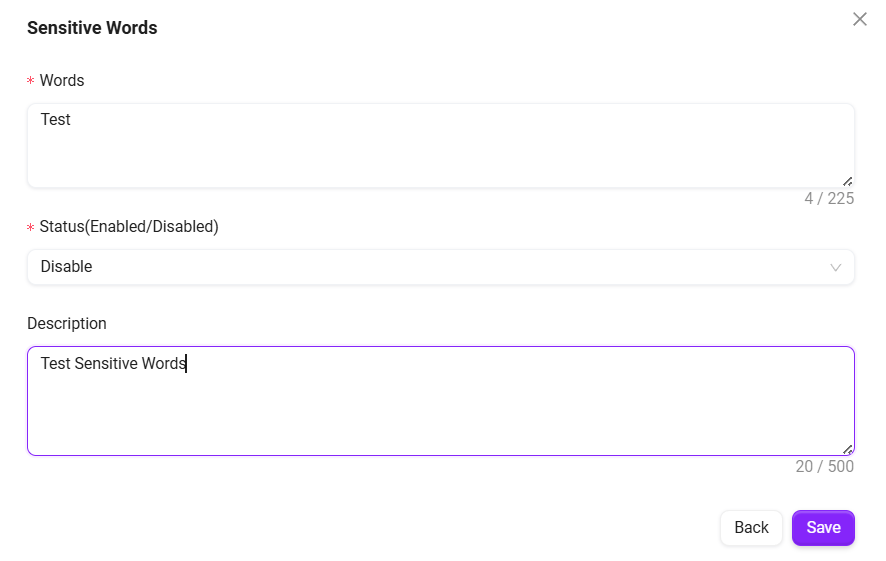
Content Security Management > Sensitive Words > New - In the pop-up window, fill in the following information:
- Sensitive Word: e.g.,
terrorism - Enable Status: select
EnableorDisable - Description (optional): additional notes on the background of adding the sensitive word
- Sensitive Word: e.g.,
- Click Save, the sensitive word will take effect immediately or be reserved for later use (depending on the enable status)
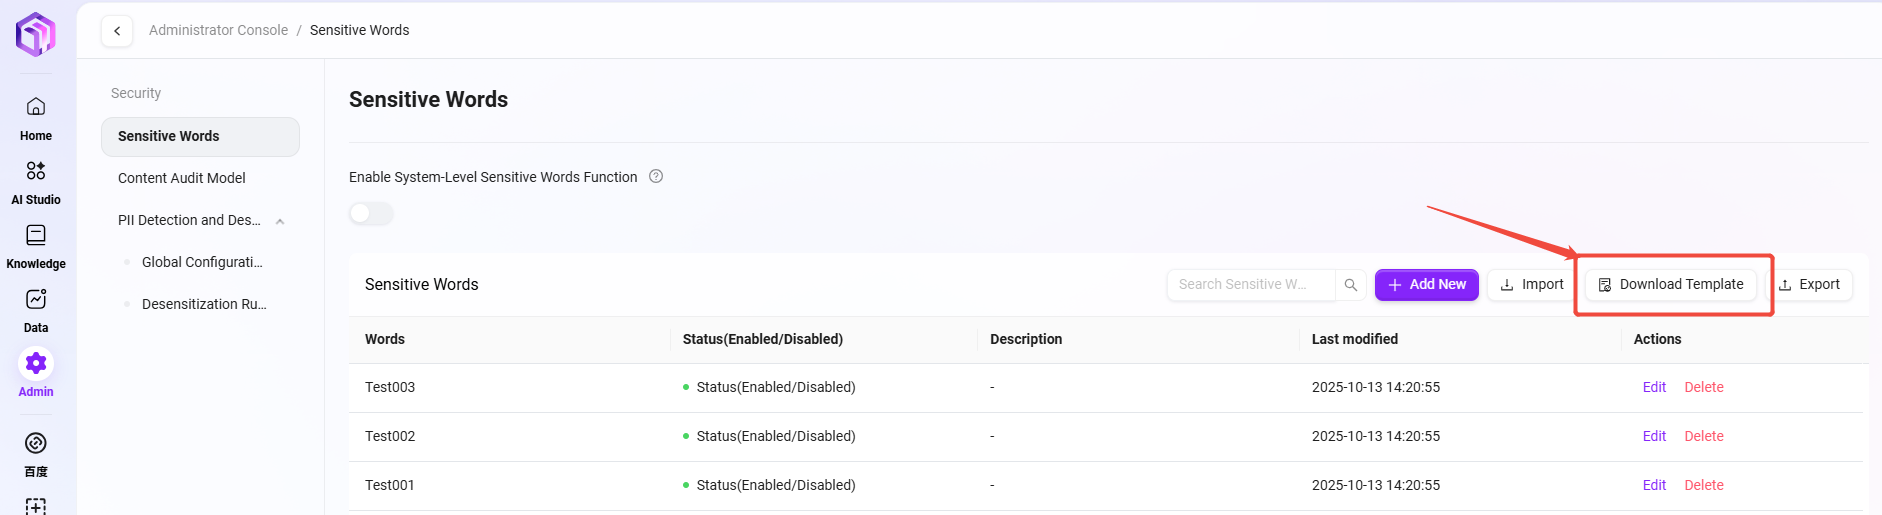
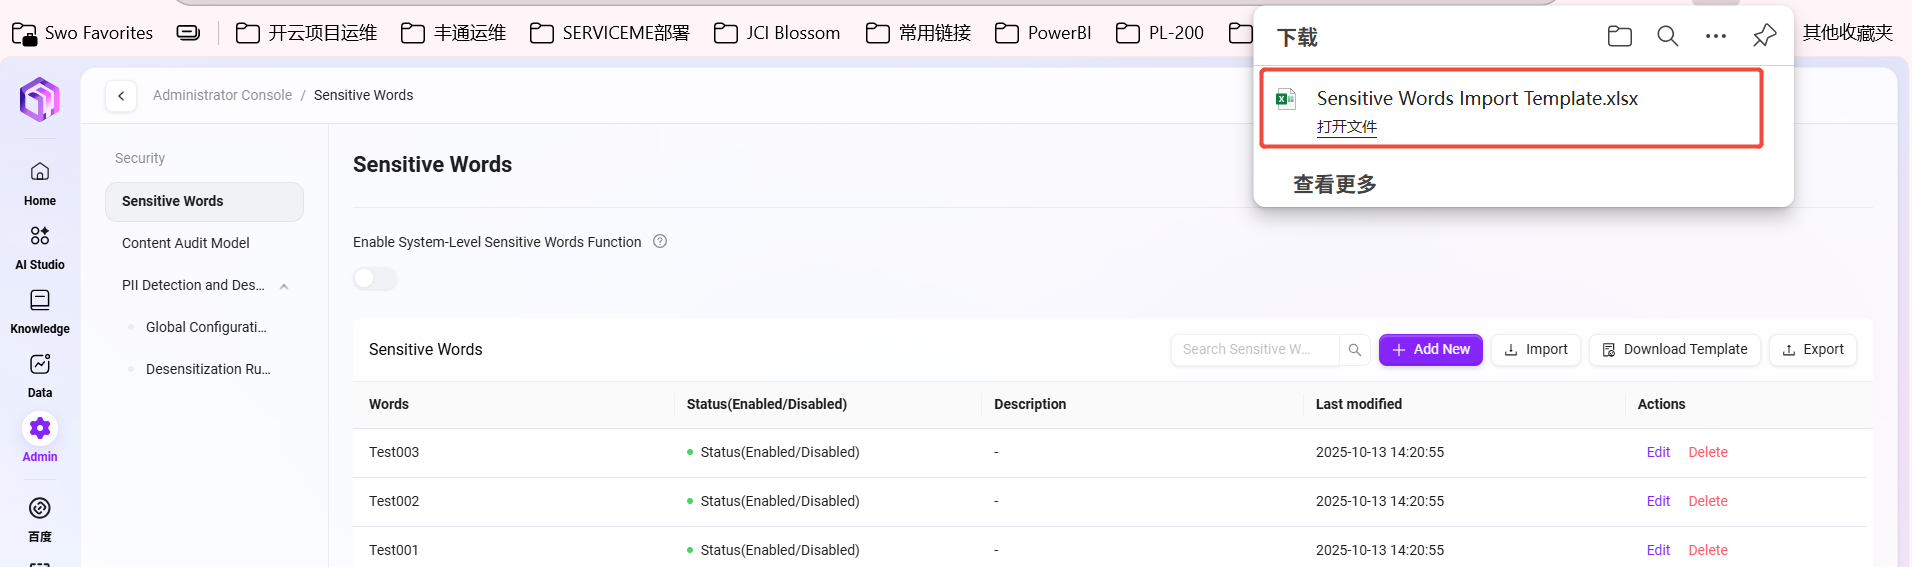
Download Import Template
To facilitate batch management of sensitive words, the system provides a unified import template, with the following steps:
- Navigate to:
Content Security Management > Sensitive Words > Download Template - The system will automatically download an Excel file, named by default:
Sensitive_Words_Import_Template.xlsx - Open the template file and fill in the following fields:
Sensitive Word(required)Enabled(Yes / No)Description(optional)
- Save the completed file for import use

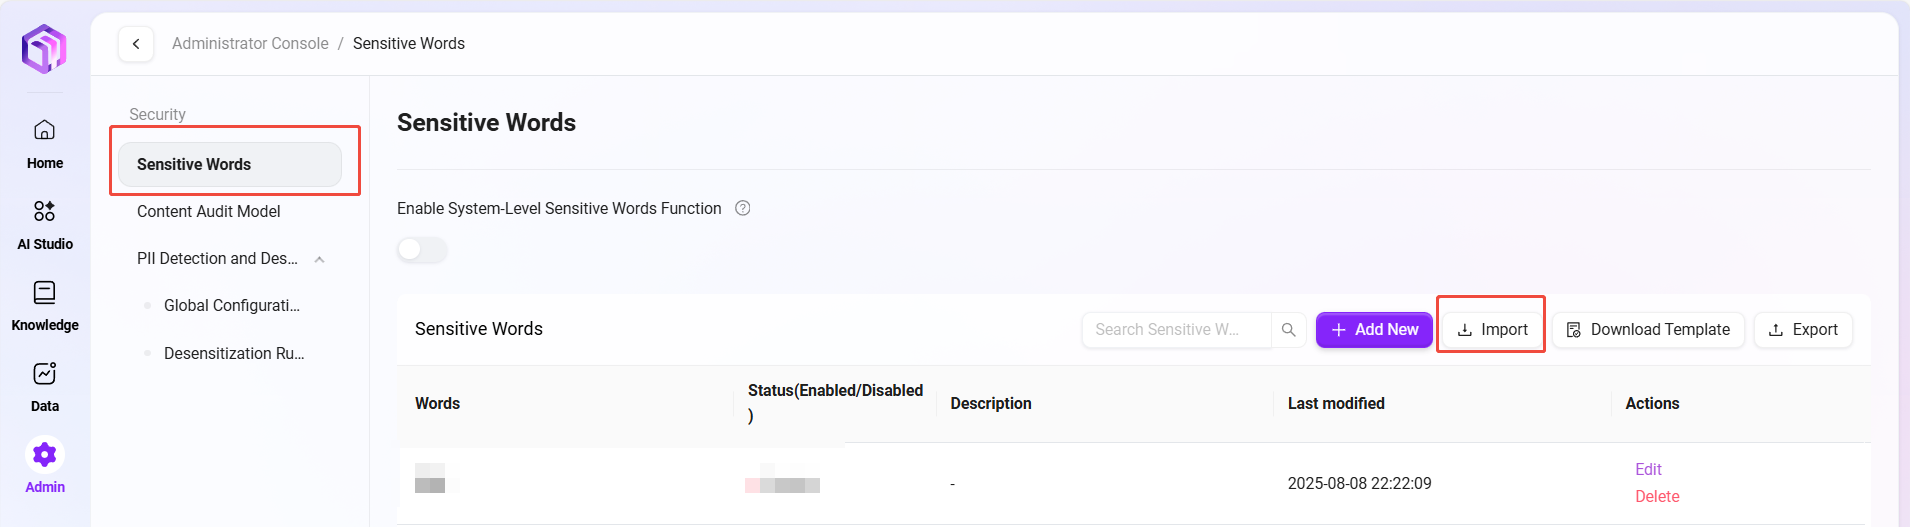
Import Sensitive Words
After preparing the sensitive word template, batch import can be performed as follows:
- Navigate to:
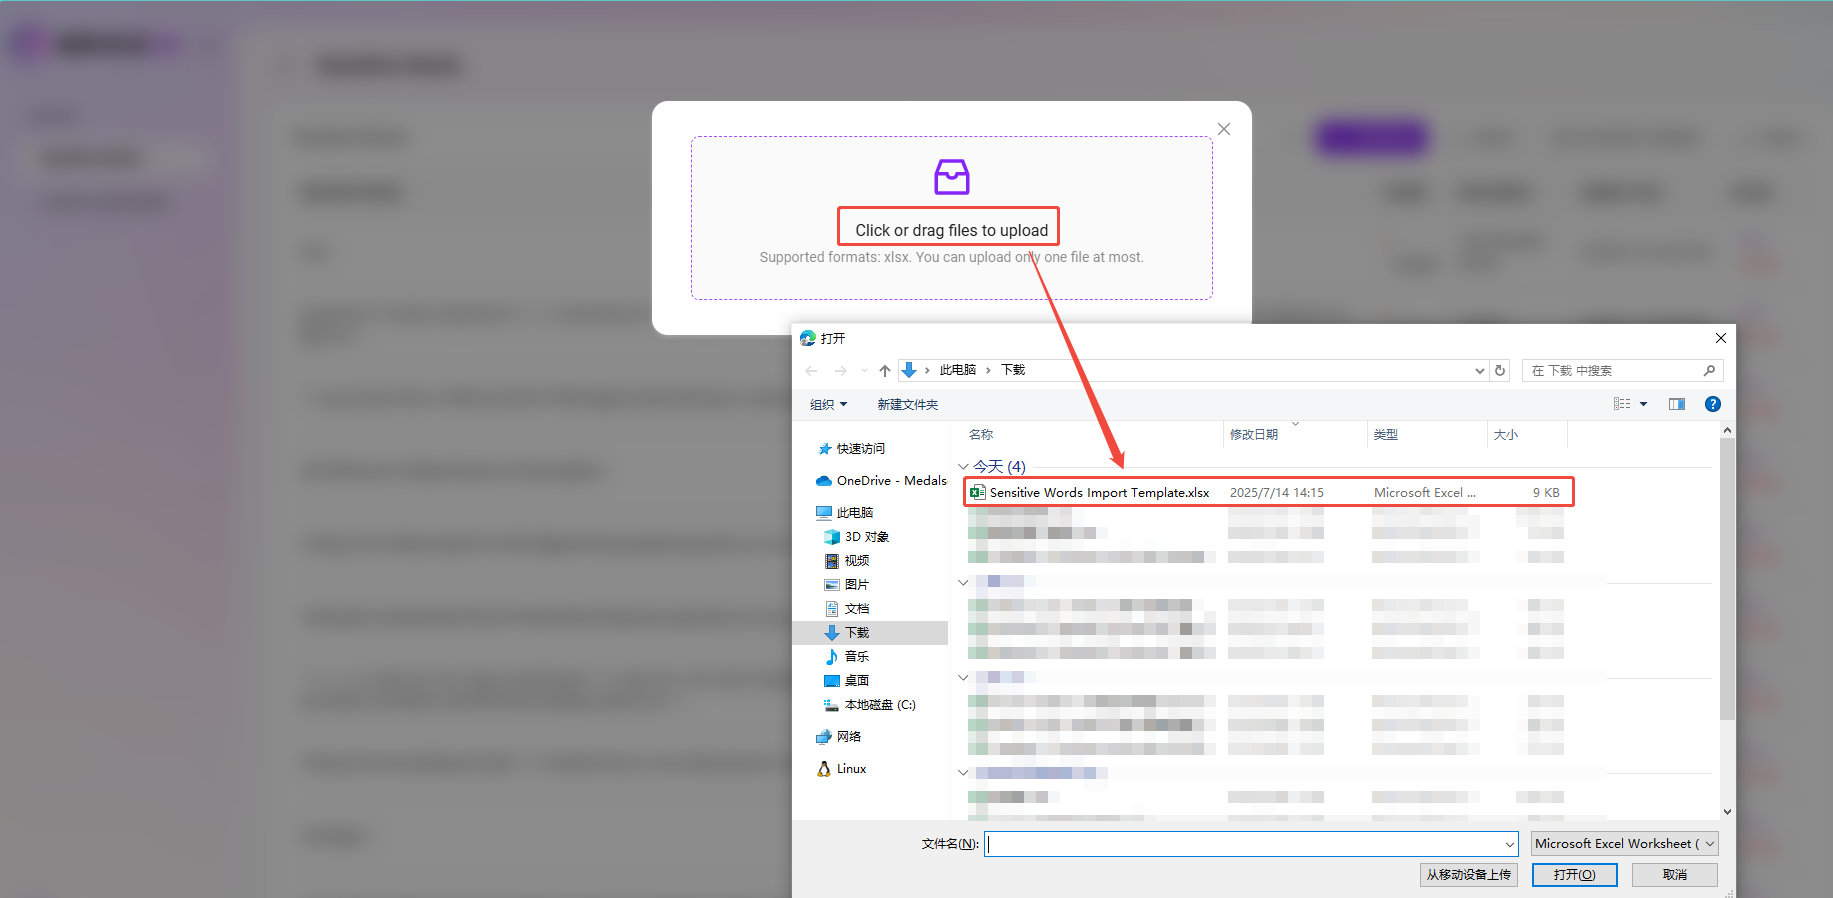
Content Security Management > Sensitive Words > Import - Click the upload area or drag and drop the template file to upload
- The system will automatically validate the content (field completeness, format, duplicates, etc.)
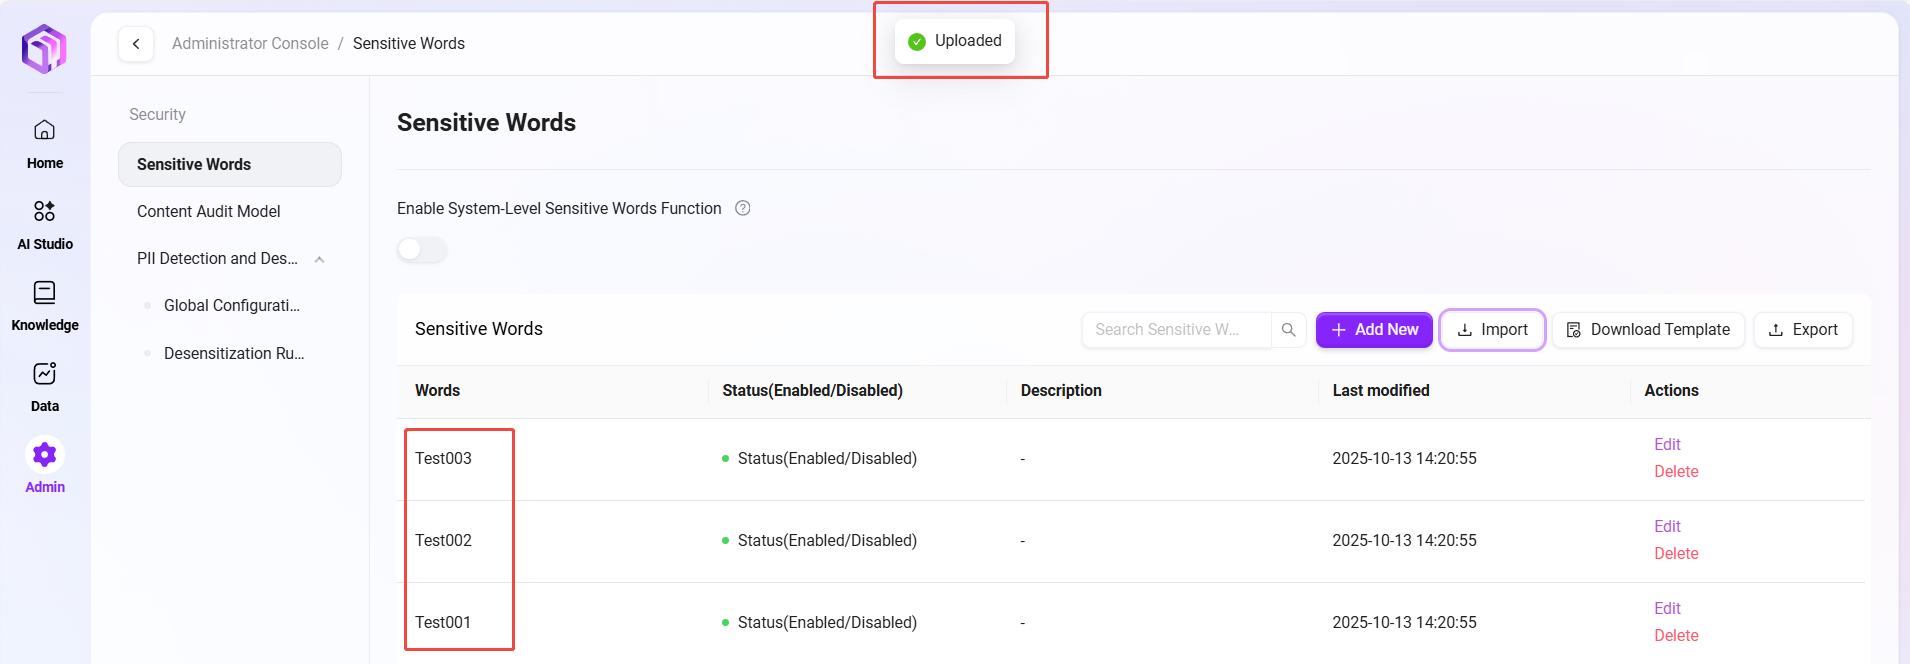
- Upon successful import, a “Upload Successful” message will be displayed, and the newly added sensitive words will appear in the list
⚠️ It is recommended to perform a small batch test first to ensure the format is correct before bulk importing
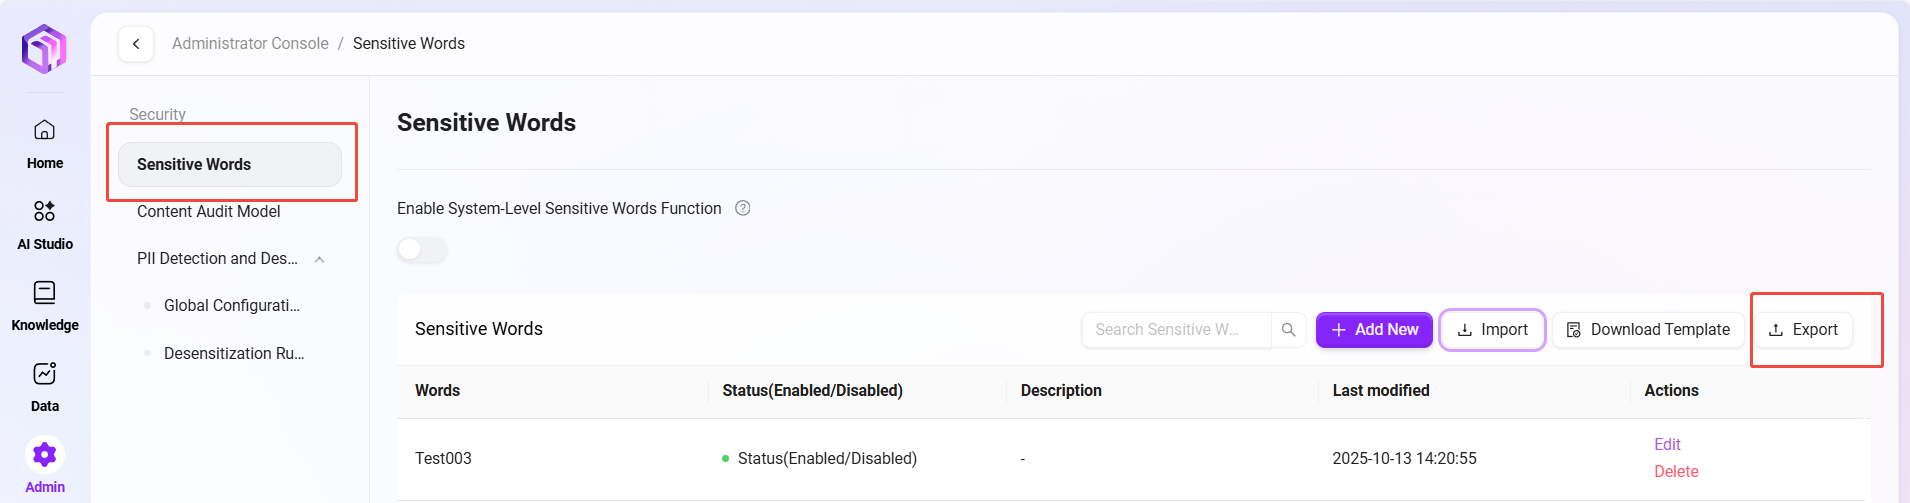
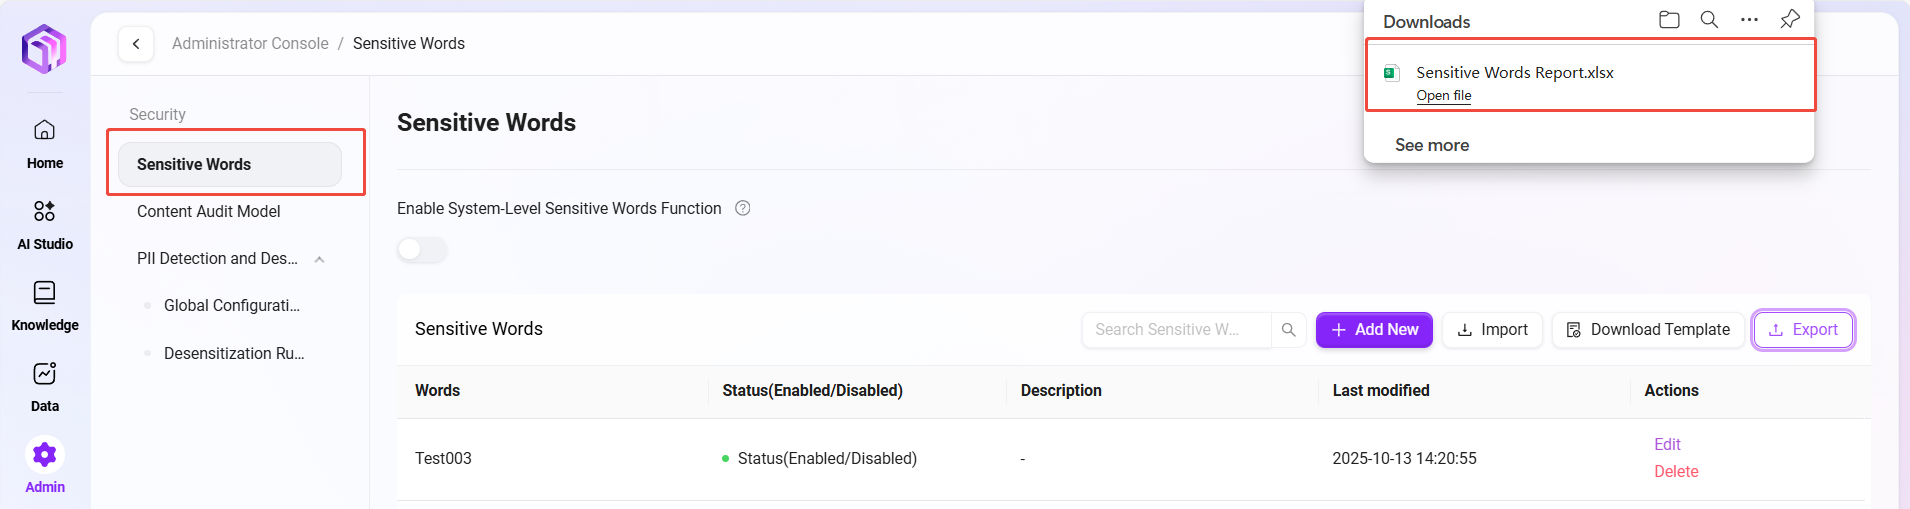
Export Sensitive Words
The system supports exporting all sensitive words currently on the platform as an Excel file, with the following steps:
- Navigate to:
Content Security Management > Sensitive Words > Export - Click Export, and the system will automatically download a
.xlsxfile, named by default:Sensitive_Words_Report.xlsx - The report includes the sensitive word itself, enable status, and description information, facilitating archiving and sharing
Content Review Model
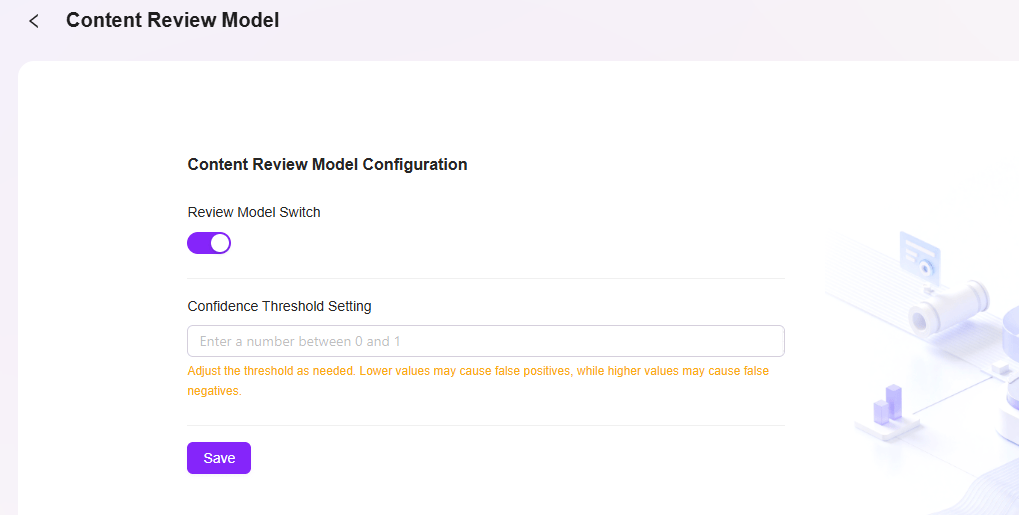
Confidence usually refers to the degree of certainty a model or system has in its prediction results.
In the context of content review models, the confidence threshold setting is an important feature that allows users to define the minimum confidence level the model must reach before marking content as a specific category (such as spam, inappropriate content, etc.). This helps reduce false positives or false negatives depending on the threshold setting.
For example, if the confidence threshold is set to 0.8, the model will only mark content as inappropriate if it is at least 80% confident in its prediction. This ensures that only cases the model is very sure about will be acted upon.
⚠️ This section is currently under development, stay tuned.
PII Detection and Desensitization
PII (Personally Identifiable Information) detection and desensitization functions are used to identify and protect data that may expose personal privacy. The system supports identifying various types of data that can identify specific individuals either independently or combined with other information. Its core role is to ensure data security and privacy compliance.
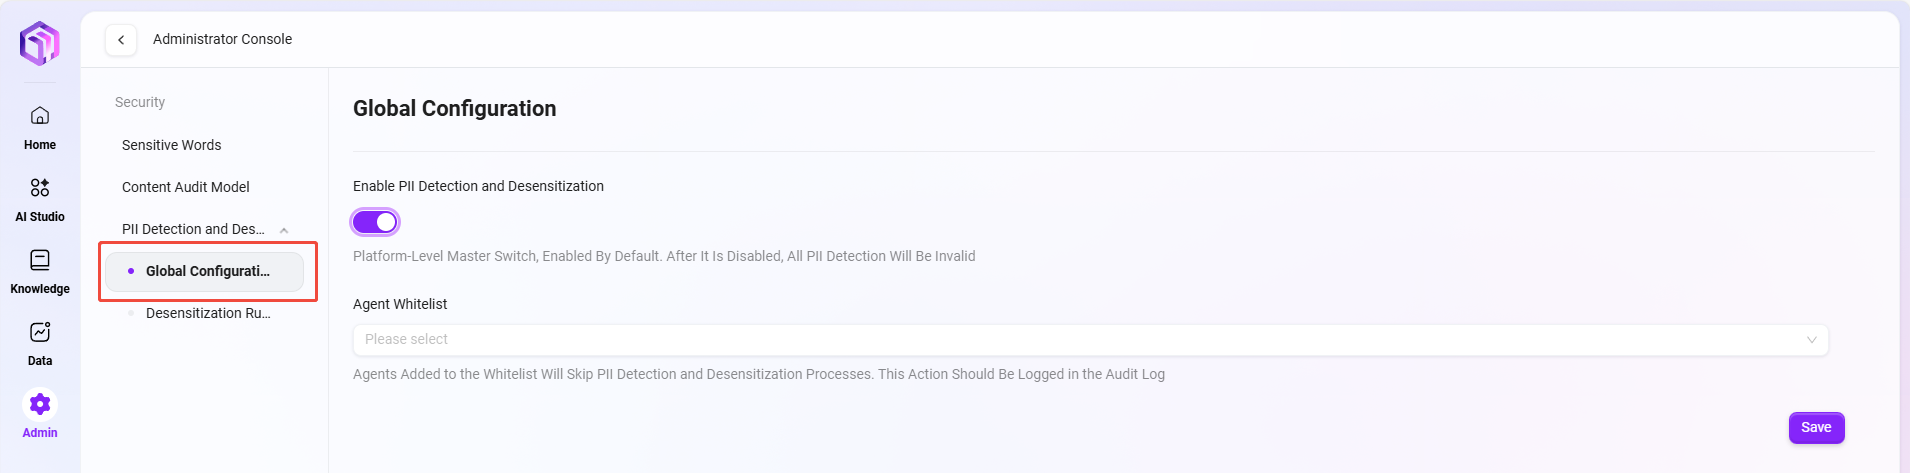
Global Configuration
Interface Description
In the “Admin Console,” navigate to [Content Security Management > PII Detection and Desensitization > Global Configuration] to set unified PII detection policies across the platform.
Configuration Items Description
- Automatic PII Detection and Desensitization:
- Platform-level switch, enabled by default.
- When enabled, the system automatically identifies personal privacy information (such as names, phone numbers, emails, ID numbers, etc.) during Agent interactions and data processing, and performs desensitization.
- If disabled, all PII detection will be inactive.
- Agent Whitelist:
- Specific Agents can be selected to be added to the whitelist.
- Agents on the whitelist will bypass PII detection and desensitization processes, but all operations will be recorded in audit logs to ensure security and traceability.
Operation Instructions
- Select Agents to exclude from detection in the “Agent Whitelist” dropdown;
- Toggle the “Automatic PII Detection and Desensitization” switch to enable or disable global detection;
- Click Save, and the configuration takes effect immediately.

Functionality
- Automatically identify and desensitize sensitive personal information to prevent privacy leaks;
- Support flexible configuration to meet privacy policies in different business scenarios;
- Audit logs trace all configuration changes, ensuring security, compliance, and control.
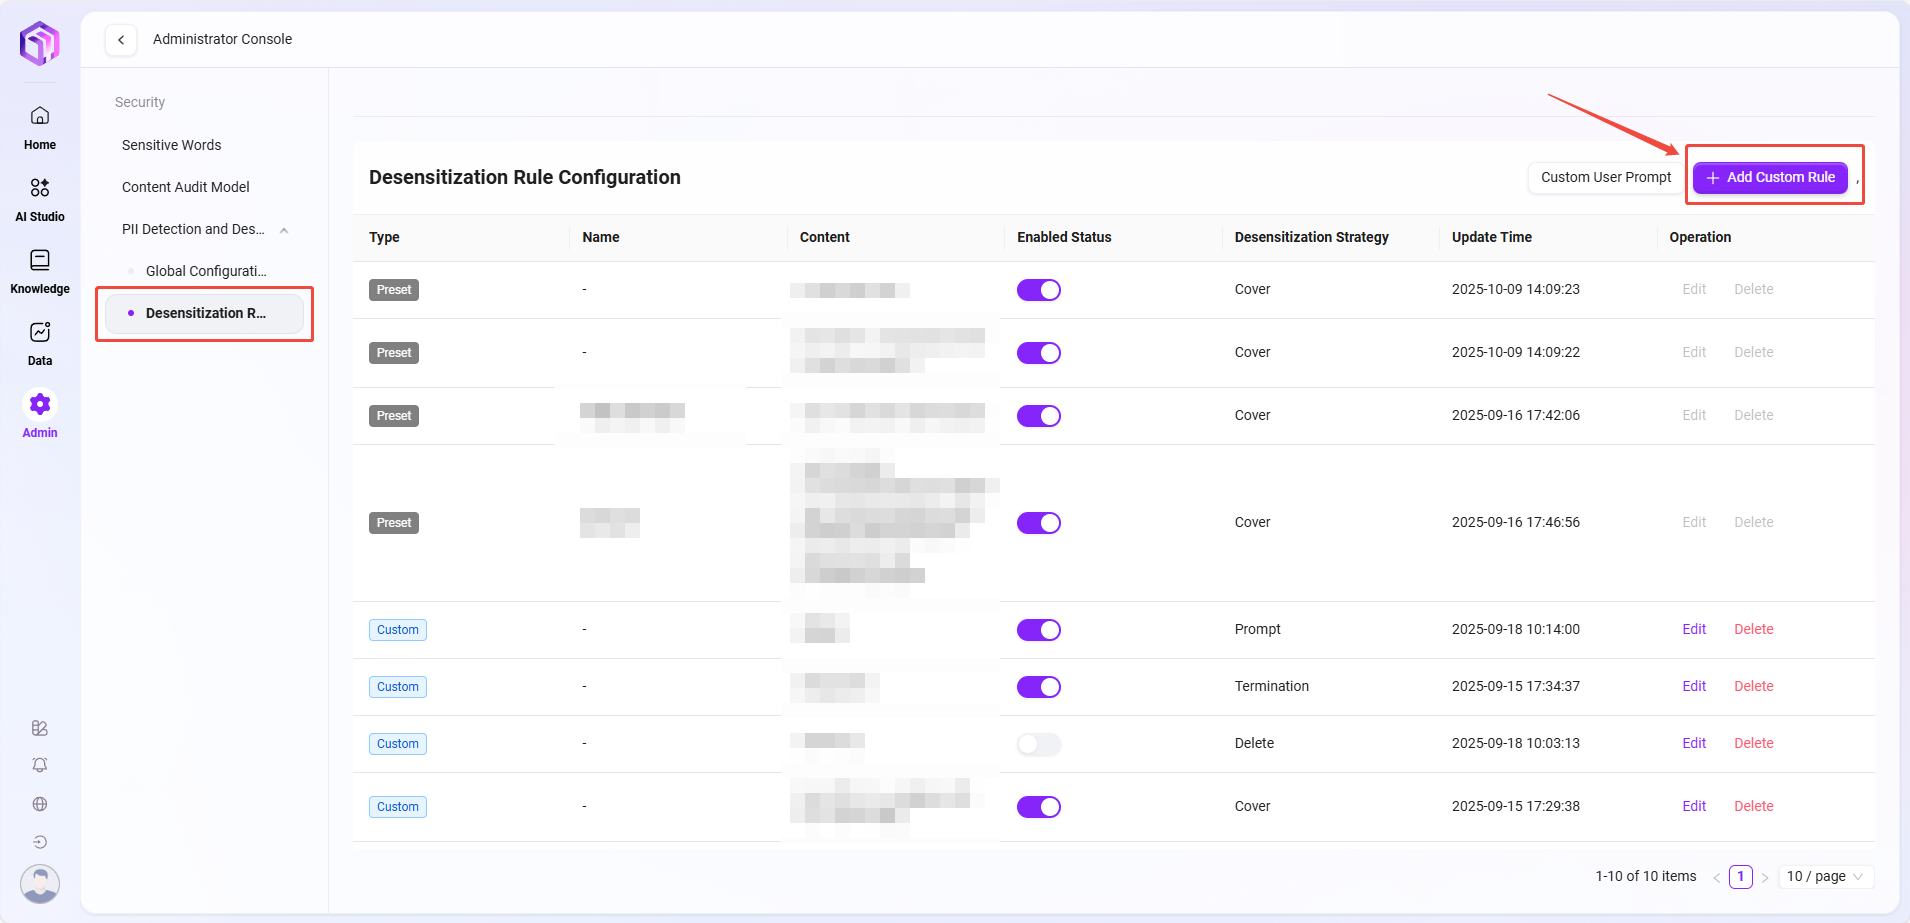
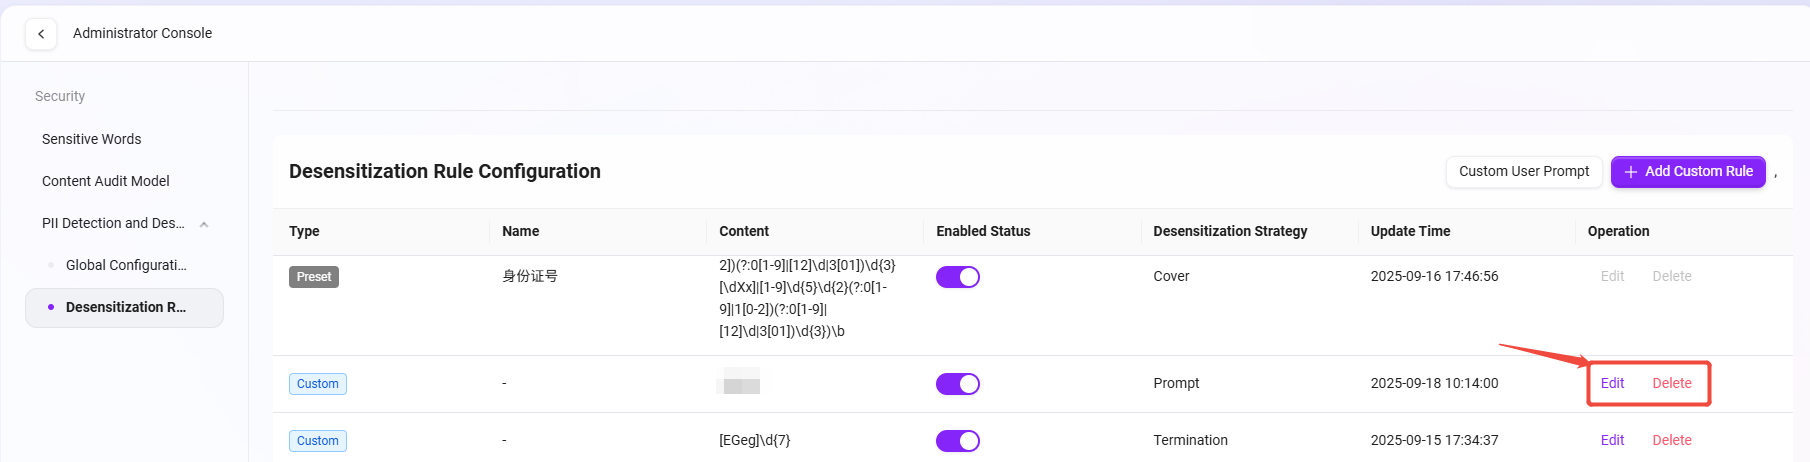
Desensitization Rule Configuration
Function Description
“Desensitization Rule Configuration” is used to define the system’s handling strategies when detecting personal sensitive information (PII). By setting different rules and policies, administrators can flexibly control how the system identifies, prompts, and desensitizes sensitive data, ensuring data compliance and privacy security.
Page Description
The page displays all desensitization rules configured in the system, including the following information:
- Rule Type: distinguishes between system built-in (preset) rules and user-defined rules.
- Rule Name: the type of sensitive information detected by the rule, such as ID number, phone number, email, etc.
- Rule Content: regular expressions or detection logic used to match sensitive information.
- Enable Status: controls whether the rule is active.
- Desensitization Strategy: the action the system takes when sensitive information is matched, options include “Mask,” “Prompt,” “Terminate,” “Delete,” etc.
- Update Time: the most recent update time of the rule.
- Actions: supports editing or deleting the rule.
Configuration Steps
-
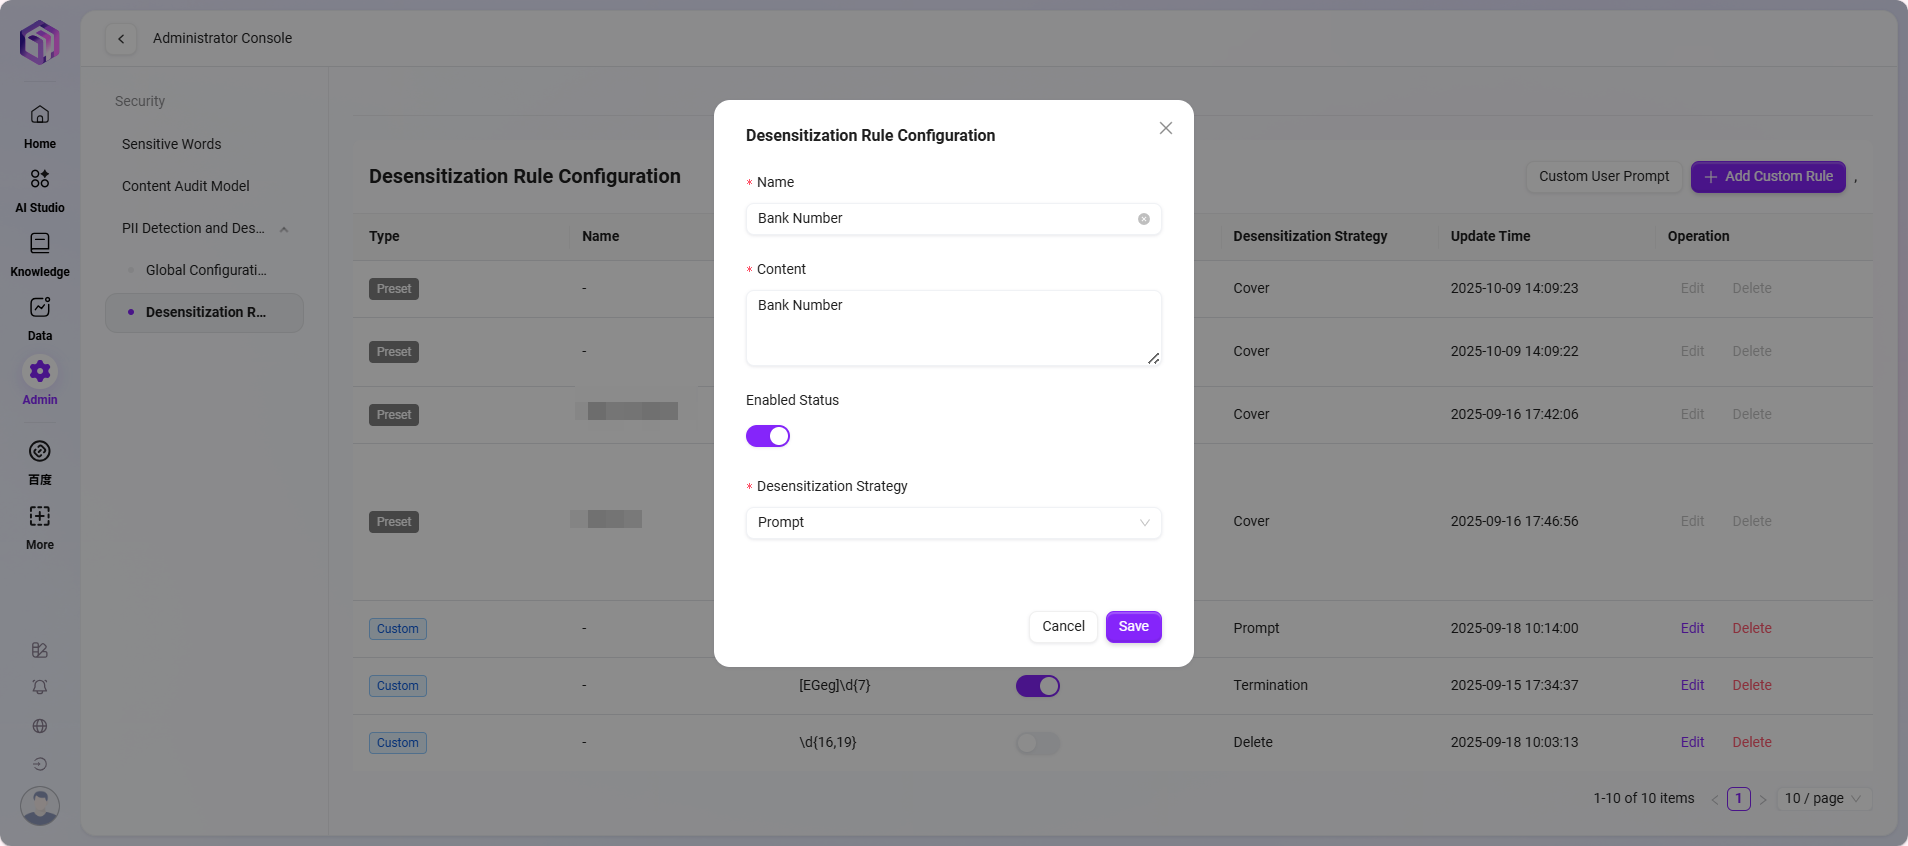
Add Custom Rule
- Click the “Add Custom Rule” button at the top right of the page;
- In the pop-up, fill in the following:
- Rule Name: name the rule, e.g.,
Bank Card Number Detection; - Rule Content: enter the regular expression used to identify this type of information;
- Enable Status: enable immediately or leave disabled as needed;
- Desensitization Strategy: select the desensitization method from the dropdown (e.g., “
Mask,” “Prompt,” “Terminate,” “Delete”);
- Rule Name: name the rule, e.g.,
- Click “Save” after completion, and the rule will take effect.
-
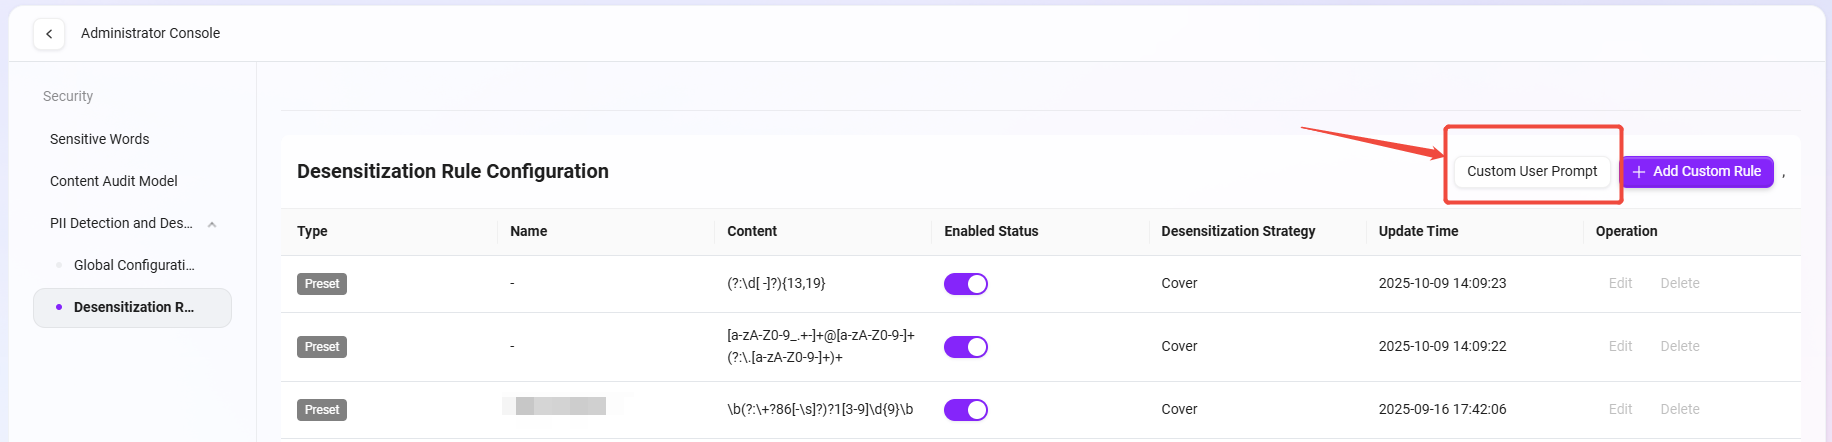
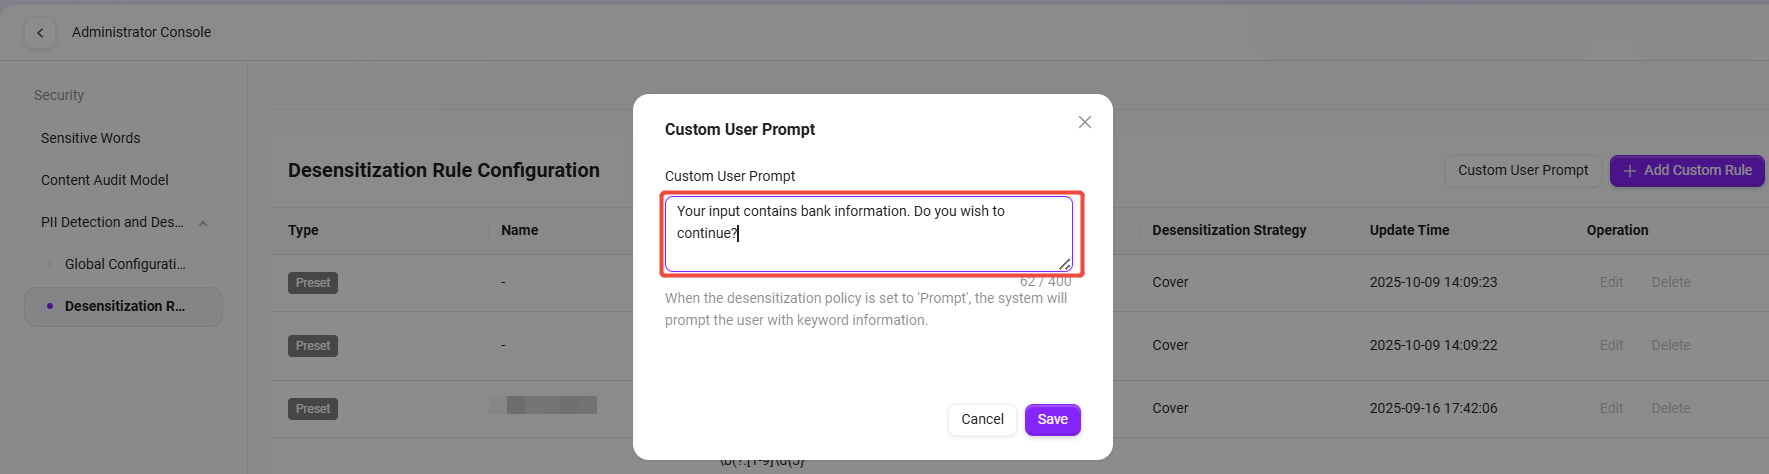
Customize User Prompt
- When the desensitization strategy is set to “Prompt,” click “Customize User Prompt” at the top right to set the prompt message;
- Example: “
Your input contains ID information, do you want to continue?”; - After saving, when users trigger this rule, the system will pop up a confirmation prompt.
-
Rule Management
- Rules can be edited anytime to modify content or strategy;
- Unneeded rules can be deleted by clicking “Delete.”
Usage Example
The system presets common sensitive information rules (such as ID numbers, mainland China phone numbers, etc.), which administrators can enable directly; custom rules can also be added based on business scenarios, such as detecting emails, bank card numbers, or other specific data formats.